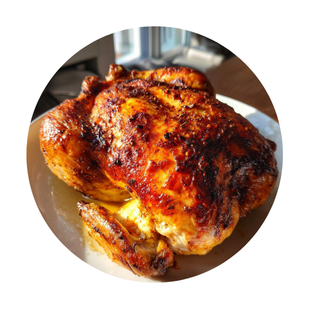

Camping Essentials: 7 Crucial Items Disclosed
Are you planning your next outdoor adventure? Camping essentials are crucial for a safe and enjoyable trip. This guide reveals the seven most important items. Do you want to make your camping experience unforgettable?
Imagine waking up to the crisp morning air. Picture yourself surrounded by the tranquil sounds of nature. Envision the aroma of freshly brewed coffee over a crackling campfire. Camping provides an escape from the everyday hustle. It allows you to reconnect with nature. It also creates lasting memories with friends and family.
Let’s explore the health benefits of embracing the great outdoors. Spending time in nature reduces stress levels. As a result, it lowers blood pressure. Exposure to sunlight boosts Vitamin D production. This strengthens your bones and immune system. In addition, hiking and other outdoor activities improve cardiovascular health.
Being in nature enhances mental well-being. Fresh air increases oxygen flow to the brain. This improves focus and concentration. Moreover, studies show that spending time in green spaces can alleviate symptoms of anxiety and depression. The absence of screens and technology allows for mental clarity. It also fosters a sense of calm.
Camping encourages physical activity. Hiking, swimming, and exploring the surrounding area provide exercise. This helps to maintain a healthy weight. It builds strength and endurance. Plus, the natural environment offers a diverse range of physical challenges. These challenges can improve your overall fitness levels.
One surprising health fact is that exposure to soil microbes can boost your immune system. Contact with these microbes helps your body build resistance to illness. This can lead to improved long-term health. Therefore, getting your hands dirty while camping can actually be beneficial.
This list of camping essentials is more than just a checklist. It is a carefully curated selection. It ensures your safety, comfort, and enjoyment in the wilderness. What makes this guide unique is its focus on practicality. It emphasizes items that are versatile. It also provides solutions for common camping challenges.
Families find this guide invaluable. Beginners appreciate the clear and concise advice. Experienced campers discover new tips and tricks. The recommendations are based on years of real-world camping experience. They also take into account various camping styles and environments.
This guide will help you prepare for your next camping trip. It includes essential gear for a smooth experience. Expect a prep time of about 1 hour. There’s no actual cook time involved. This is a guide, not a recipe. It’s perfect for weekend getaways or extended wilderness adventures.
What are Camping Essentials?
Camping essentials are the items necessary for a safe, comfortable, and enjoyable camping experience. These items range from basic survival gear to comfort items. They ensure you are prepared for various outdoor conditions. They also allow you to make the most of your time in nature.
The specific items you need will vary. They vary based on the type of camping you plan to do. They also depend on the environment and duration of your trip. However, some items are universally considered essential. They include a tent, sleeping bag, cooking equipment, and first-aid kit.
Why You Will Love This Guide
- This guide provides a comprehensive list of essential items. It ensures you won’t forget anything important.
- It offers practical advice. It is based on real-world camping experiences.
- The guide includes tips for selecting the right gear. It also offers advice on how to use it effectively.
- It helps you stay safe and comfortable in the outdoors. You’ll be prepared for various weather conditions.
- It simplifies the packing process. You can focus on enjoying your camping trip.
Items You Need
- Tent: Provides shelter from the elements. It is crucial for a comfortable night’s sleep.
- Sleeping Bag: Keeps you warm in cool temperatures. Choose one rated for the expected conditions.
- Cooking Equipment: Allows you to prepare meals. A portable stove and cookware are essential.
- First-Aid Kit: Addresses minor injuries and emergencies. Include bandages, antiseptic wipes, and pain relievers.
- Navigation Tools: Helps you find your way. A map and compass are reliable options. A GPS device is also useful.
- Lighting: Provides visibility at night. A headlamp or flashlight is essential for safety.
- Water and Food: Sustains you during your trip. Pack enough for the duration of your stay.
How to Prepare for Your Trip Step by Step
- Create a Checklist: Start by creating a detailed checklist of all the items you need. Refer to this guide for inspiration. Tailor it to your specific needs and preferences.
- Gather Your Gear: Collect all the items on your checklist. Inspect them for any damage or wear. Replace or repair items as needed.
- Test Your Equipment: Set up your tent in your backyard. Test your cooking equipment before you leave. This ensures everything is in working order.
Pro Tip: Practice setting up your tent in the dark. This will help you do it quickly and efficiently if you arrive at your campsite late.
- Pack Strategically: Pack your gear in a way that is organized and accessible. Place frequently used items in easily reachable locations. Distribute the weight evenly in your backpack.
- Plan Your Meals: Plan your meals in advance. Pack non-perishable food items that are easy to prepare. Consider pre-portioning ingredients to save time and space.
- Check the Weather: Check the weather forecast before you leave. Pack appropriate clothing and gear for the expected conditions. Be prepared for unexpected changes in weather.
- Inform Someone of Your Plans: Tell a friend or family member about your camping plans. Provide them with your itinerary and expected return date. This ensures someone knows where you are in case of an emergency.
Expert Tips for Best Results
- Choose a campsite that is appropriate for your skill level. Consider factors such as terrain, accessibility, and amenities.
- Practice Leave No Trace principles. Pack out everything you pack in. Minimize your impact on the environment.
- Store food properly to prevent attracting animals. Use bear-resistant containers or hang food from a tree.
- Stay hydrated by drinking plenty of water. Carry a water filter or purification tablets to treat water from natural sources.
- Dress in layers to regulate your body temperature. This allows you to adapt to changing weather conditions.
- Learn basic first-aid skills. Be prepared to handle minor injuries and emergencies.
- Pack a repair kit for your gear. Include items such as duct tape, a multi-tool, and spare parts.
Variations and Substitutions
- Dietary Restrictions: Adapt your meal plan to accommodate dietary restrictions such as gluten-free, dairy-free, or vegetarian. Substitute ingredients as needed.
- Regional Variations: Adjust your gear and clothing to suit the specific environment you will be camping in. Consider factors such as climate, terrain, and wildlife.
- Seasonal Variations: Modify your packing list to account for seasonal changes in weather. Pack warmer clothing and gear for winter camping. Bring insect repellent for summer camping.
- Budget-Friendly Options: Choose affordable gear and equipment to save money. Consider renting or borrowing items you don’t use frequently.
How to Pack and Store
When packing your camping essentials, organize items by category. Use packing cubes or stuff sacks to compress clothing and gear. Distribute weight evenly in your backpack. Keep frequently used items accessible.
Store your camping gear in a dry, cool place when not in use. Clean and dry your tent and sleeping bag before storing them. This prevents mold and mildew growth. Inspect your gear regularly for damage or wear.
Freezing is not applicable for most camping gear. However, some food items can be frozen for later use. Check the specific storage instructions for each item.
Reheating depends on the specific item. Cooked food can be reheated over a campfire or portable stove. Use appropriate containers and cooking methods.
Frequently Asked Questions
What is the most important thing to bring when camping?
Yes, the most important thing is a reliable shelter. This could be a tent or a tarp. Shelter protects you from the elements.
Can I use a regular sleeping bag for camping?
Yes, you can, but consider the temperature rating. A camping-specific sleeping bag is usually warmer. It is also more compact.
How much water should I bring camping?
Bring at least one gallon of water per person per day. This is crucial for drinking and cooking. A water filter is also a good idea.
What kind of shoes are best for camping?
Hiking boots are ideal. They provide ankle support and traction. Waterproof boots are preferable for wet conditions.
What should I do if it rains while camping?
Stay inside your tent or under a tarp. Ensure your gear is protected from the rain. Avoid touching metal during thunderstorms.
Is it safe to cook food inside a tent?
No, it is not safe. Cooking inside a tent can lead to carbon monoxide poisoning. Always cook in a well-ventilated area.
In conclusion, mastering your camping essentials ensures a safe and enjoyable outdoor experience. By following this guide, you can prepare effectively. You’ll also make the most of your time in nature. Try this recipe today and leave a comment below!
Print
Camping Essentials: 7 Crucial Items Disclosed
Description
Dieses kandierte Apfelrezept ergibt einen perfekt glänzenden, hart-knackigen Zuckerüberzug, der beim ersten Biss sauber zerbricht – jedes Mal. Mit nur 5 Zutaten aus dem Vorratsschrank und in 30 Minuten zubereitet, wecken diese klassischen, hausgemachten kandierten Äpfel jede Jahrmarkt- und Halloween-Erinnerung, die Sie haben. Keine klebrige Beschichtung, kein trübes Finish, kein Rätselraten – nur das Echte, direkt in Ihrer Küche zubereitet. Das Geheimnis ist eine Zahl: 149°C. Erreichen Sie diese Temperatur und Sie können nicht scheitern.
Ingredients
- 6 mittelgroße Äpfel, feste Sorte – Granny Smith (säuerlich) oder Fuji (süß) dringend empfohlen
- 400 g Kristallzucker
- 120 ml heller Maissirup
- 180 ml Wasser
- 1/2 Teelöffel rote Gel-Lebensmittelfarbe (Gel ergibt eine tiefere Farbe als Flüssigkeit)
- 1/2 Teelöffel Zimtextrakt oder Aromaöl (optional)
- 6 Holzstiele für kandierte Äpfel oder stabile Lutscherstiele
- Antihaft-Kochspray
- Backpapier oder Silikonbackmatte
Instructions
- Bereiten Sie Ihren Arbeitsbereich vor, bevor Sie beginnen: Legen Sie ein Backblech mit Backpapier aus und sprühen Sie es leicht mit Antihaft-Kochspray ein. Halten Sie Ihre Äpfel am Stiel bereit und in Reichweite. Sobald der Zucker die Temperatur erreicht hat, müssen Sie schnell handeln – Vorbereitung ist alles.
- Entfernen Sie jegliches Wachs von Ihren Äpfeln. Gekaufte Äpfel haben eine lebensmittelechte Wachsbeschichtung, die verhindert, dass der Zucker haftet, und Blasen verursacht. Tauchen Sie jeden Apfel 5 Sekunden lang in kochendes Wasser und schrubben Sie ihn dann mit einem rauen Küchentuch trocken. Stecken Sie einen Holzstiel fest in das Stielende jedes Apfels und schieben Sie ihn mindestens bis zur Hälfte durch. Legen Sie ihn auf Ihr vorbereitetes Backblech.
- Kombinieren Sie in einem mittelgroßen Topf mit schwerem Boden den Zucker, den Maissirup und das Wasser. Rühren Sie vorsichtig um, bis der Zucker befeuchtet ist. Befestigen Sie ein Zuckerthermometer an der Seite des Topfes und stellen Sie sicher, dass die Spitze in die Mischung eingetaucht ist, aber nicht den Boden des Topfes berührt – eine ungenaue Messung ruiniert die Beschichtung.
- Stellen Sie den Topf bei mittlerer bis hoher Hitze auf den Herd. Bringen Sie die Mischung ohne Rühren zum vollständigen Aufkochen. Sobald die Mischung kocht, verwenden Sie einen feuchten Backpinsel, um Zuckerkristalle abzuwischen, die an den Seiten des Topfes haften – alle Kristalle, die zurückfallen, können dazu führen, dass die gesamte Charge kristallisiert.
- Kochen Sie weiter, ohne zu rühren, bis das Zuckerthermometer zwischen 149 °C und 154 °C anzeigt – dies ist das Hartbruchstadium. Dies dauert etwa 15 bis 20 Minuten. Die Temperatur steigt zuerst langsam an und beschleunigt sich dann gegen Ende dramatisch. Gehen Sie in den letzten 5 Minuten nicht weg.
- Nehmen Sie den Topf sofort vom Herd, sobald er 149 °C erreicht hat. Rühren Sie die Gel-Lebensmittelfarbe und gegebenenfalls den Zimtextrakt ein. Nicht zu viel rühren – ein paar sanfte Drehungen reichen aus. Warten Sie nun. Lassen Sie alle Blasen vollständig abklingen, etwa 1 bis 2 Minuten. Das Eintauchen in einen sprudelnden Sirup hinterlässt eine strukturierte, ungleichmäßige Beschichtung auf Ihren Äpfeln.
- Neigen Sie den Topf zur Seite, sodass sich der Sirup tief in einer Ecke sammelt – dies erleichtert die vollständige Abdeckung. Arbeiten Sie jeweils mit einem Apfel, tauchen und drehen Sie jeden Apfel, um ihn vollständig zu beschichten, und lassen Sie den Überschuss 3 bis 4 Sekunden lang zurück in den Topf tropfen. Legen Sie jeden beschichteten Apfel mit dem Stiel nach oben auf das vorbereitete Backblech. Berühren oder bewegen Sie die Äpfel nicht, während sie fest werden. Lassen Sie sie bei Raumtemperatur mindestens 20 Minuten lang vollständig abkühlen, bevor Sie sie servieren. Die Beschichtung härtet zu einem glasartigen Finish aus.
Notes
- Warum ist meine kandierte Apfelbeschichtung klebrig oder zäh? Der Sirup hat nicht 149 °C (Hartbruchstadium) erreicht. Schon ein paar Grad weniger – bei 132 °C oder 135 °C – hinterlassen zu viel Wasser im Zucker, was zu einer weichen, taffyartigen Textur anstelle einer harten Schale führt. Verwenden Sie immer ein kalibriertes Zuckerthermometer und nehmen Sie es nicht frühzeitig vom Herd.
- Warum ist meine kandierte Apfelbeschichtung trüb oder voller Blasen? Sie haben eingetaucht, bevor sich die Blasen nach dem Hinzufügen der Lebensmittelfarbe vollständig gesetzt haben. Warten Sie immer 1 bis 2 volle Minuten nach dem Entfernen vom Herd, bis die Oberfläche vollständig ruhig und glänzend ist, bevor Sie eintauchen.
- Warum haftet die Beschichtung nicht an meinem Apfel? Die Apfeloberfläche war noch wachsig oder leicht feucht. Wachs und Wasser verhindern die Zuckerhaftung. Entfernen Sie Wachs mit einem 5-Sekunden-Tauchbad in kochendem Wasser und trocknen Sie es dann mit einem rauen Tuch vollständig ab, bevor Sie eintauchen.
- Kandierte Äpfel niemals im Kühlschrank aufbewahren. Kalte Luft und Feuchtigkeit führen dazu, dass die harte Zuckerbeschichtung Feuchtigkeit aufnimmt und klebrig wird. Bei Raumtemperatur, unbedeckt oder lose verpackt aufbewahren und innerhalb von 1 bis 2 Tagen für die beste Textur essen.
- Wenn der Sirup beim Eintauchen zu stark eindickt, stellen Sie den Topf 20 bis 30 Sekunden lang bei schwacher Hitze auf den Herd, um ihn zu lösen. Fügen Sie kein Wasser hinzu.
- Um kandierte Äpfel ohne Maissirup herzustellen: Ersetzen Sie ihn durch 1 Teelöffel weißen Essig oder frischen Zitronensaft. Dies verhindert die Zuckerkristallisation auf die gleiche Weise wie Maissirup.
- Für Halloween-kandierte Äpfel: Tauschen Sie rote Gel-Farbe gegen schwarze, tiefviolette oder waldgrüne Farbe aus, um ein gruseliges, dramatisches Finish zu erzielen. Schwarze Lebensmittelfarbe funktioniert am besten mit extra-schwarzem Gel, nicht mit normalem Schwarz.
- Bester Tag, um kandierte Äpfel herzustellen: ein kühler, trockener Tag mit geringer Luftfeuchtigkeit. An feuchten Tagen bleibt die Beschichtung auch nach dem vollständigen Abkühlen klebrig. Vermeiden Sie es, diese an regnerischen Tagen oder in einer dampfenden Küche herzustellen.
- Apfelsorte spielt eine Rolle: Granny Smith ergibt einen säuerlich-süßen Kontrast, der die Zuckerbeschichtung durchbricht. Fuji und Honeycrisp sind süßer und ebenso fest. Vermeiden Sie weiche Sorten wie McIntosh oder Red Delicious – sie werden unter dem heißen Zucker matschig.
Nutrition
- Serving Size: 1 kandierter Apfel
- Calories: 271
- Sugar: 65
- Sodium: 3
- Fat: 1
- Saturated Fat: 0
- Unsaturated Fat: 1
- Trans Fat: 0
- Carbohydrates: 71
- Fiber: 4
- Protein: 1
- Cholesterol: 0
Keywords: Rezept für kandierte Äpfel, hausgemachte kandierte Äpfel, einfaches Rezept für kandierte Äpfel, Halloween-kandierte Äpfel, kandierter Apfel ohne Maissirup, kandierte Äpfel mit hartem Bruch, glänzende kandierte Äpfel, kandierte Äpfel von Grund auf, Rezept für kandierte Äpfel im Herbst, Jahrmarkt-kandierte Äpfel, wie man kandierte Äpfel herstellt, Tipps für kandierte Äpfel, klebrige kandierte Apfelreparatur, beste Äpfel für kandierte Äpfel